How to Stream 24/7 on YouTube For Free With OBS
The demand for 24/7 live streaming has increased in online content creation. Whether for business purposes, continuous engagement with your audience, or simply showcasing a curated playlist, streaming round the clock can be achieved efficiently using OBS Studio. This step-by-step steer will walk you through setting up a 24/7 live stream on YouTube using OBS Studio, incorporating pre-recorded videos through a VLC playlist.
One powerful tool that empowers creators to meet this demand is OBS Studio. OBS Studio, short for Open Broadcaster Software Studio, is a versatile and open-source software that allows users to capture, mix, and stream content seamlessly. This extensive guide will delve into the intricate yet rewarding process of setting up a 24/7 live stream on YouTube using OBS Studio. Furthermore, we'll explore the incorporation of pre-recorded videos into this live stream, achieved through the utilization of a VLC playlist.
As the digital period continues to evolve, businesses increasingly recognize the potential of 24/7 live streaming as a strategic asset. Maintaining a constant online presence for product launches, virtual events, or ongoing customer engagement can significantly enhance brand visibility and audience interaction. Beyond business applications, content creators across various niches are embracing the idea of continuous streaming as a means to connect with their audience in real time, fostering a sense of community and loyalty.
Step 1: Download and Install OBS Studio
Open your web browser and navigate to the official OBS Studio website at https://obsproject.com/. It is the legitimate source for downloading the latest and most secure version of OBS Studio.
- - For Windows users, a specific installer will be tailored for the Windows operating system.
- - For macOS users, the download will be a .dmg file designed for Mac systems.
- - Linux users will find instructions and links relevant to various Linux distributions.
Download OBS Studio
Click the download button, and the OBS Studio installation file will launch downloading to your computer. The file size is relatively moderate, ensuring a quick download process.
Install OBS Studio
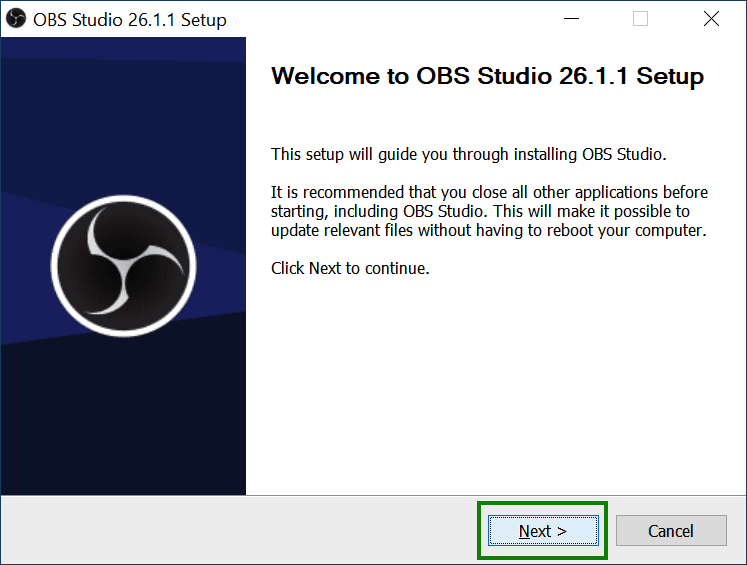
Discover the downloaded file on your computer and initiate the installation process. The installation genius will guide you through the necessary steps. Follow the on-screen instructions to choose installation preferences and specify the destination folder.
Customize Installation Options
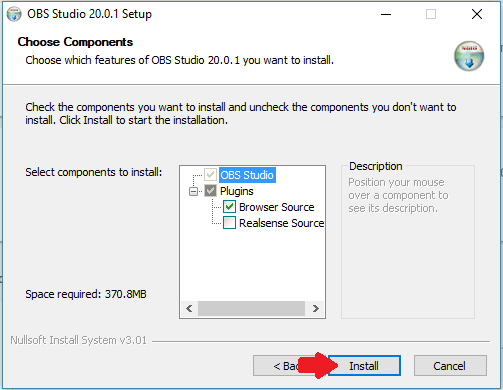
During the installation, you may be presented with customization options. You can choose whether to install additional plugins, shortcuts, and other features depending on your preferences. Ensure you carefully review and select options that align with your streaming needs.
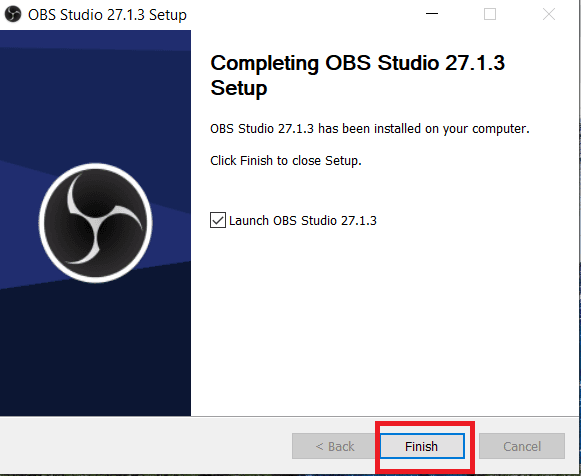
Complete the Installation
Once you've configured the installation settings, complete the installation process. OBS Studio will finalize the setup, and you'll receive a notification confirming that the software has been successfully installed on your computer.
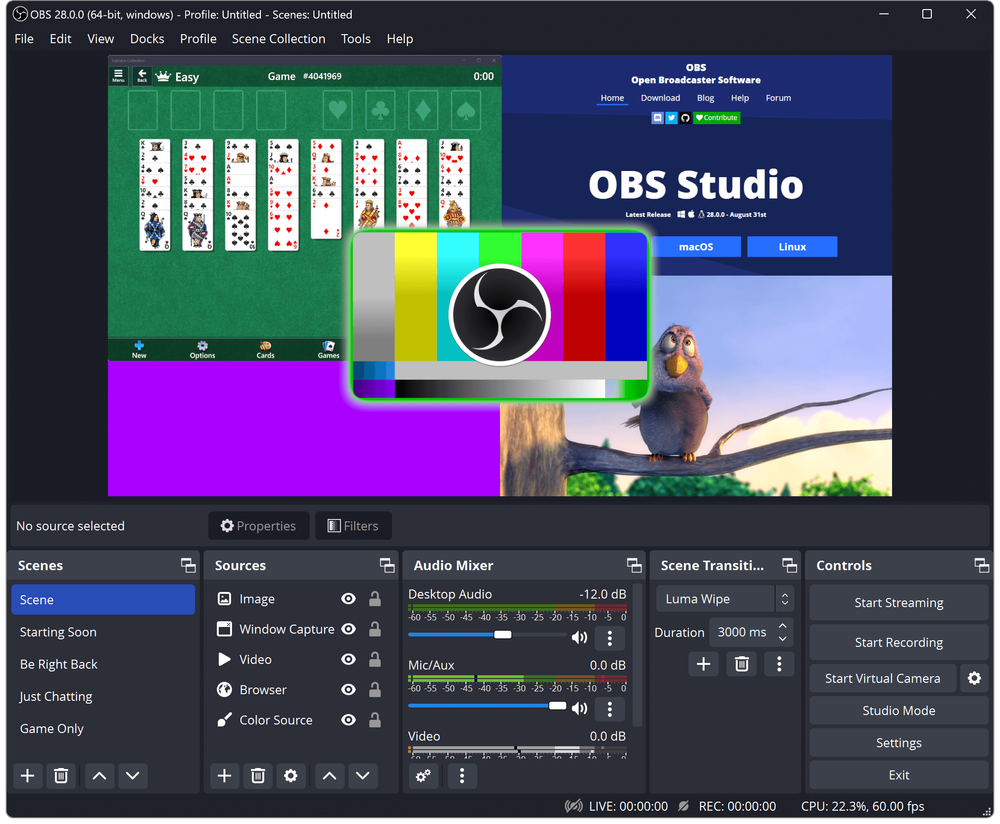
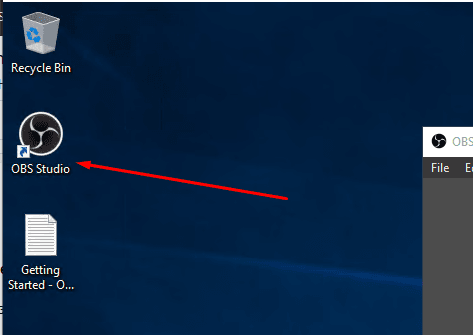
Launch OBS Studio
After installation, you can launch OBS Studio from your desktop or the start menu. The software will open to a clean interface, ready for you to start configuring your scenes and sources for your 24/7 live stream.
By following these steps, you've successfully downloaded and installed OBS Studio, laying the foundation for creating a continuous and engaging livestream experience for your audience. Configure OBS Studio for YouTube streaming and integrate pre-recorded videos seamlessly into your 24/7 live stream.
Step 2: Create your live stream on YouTube
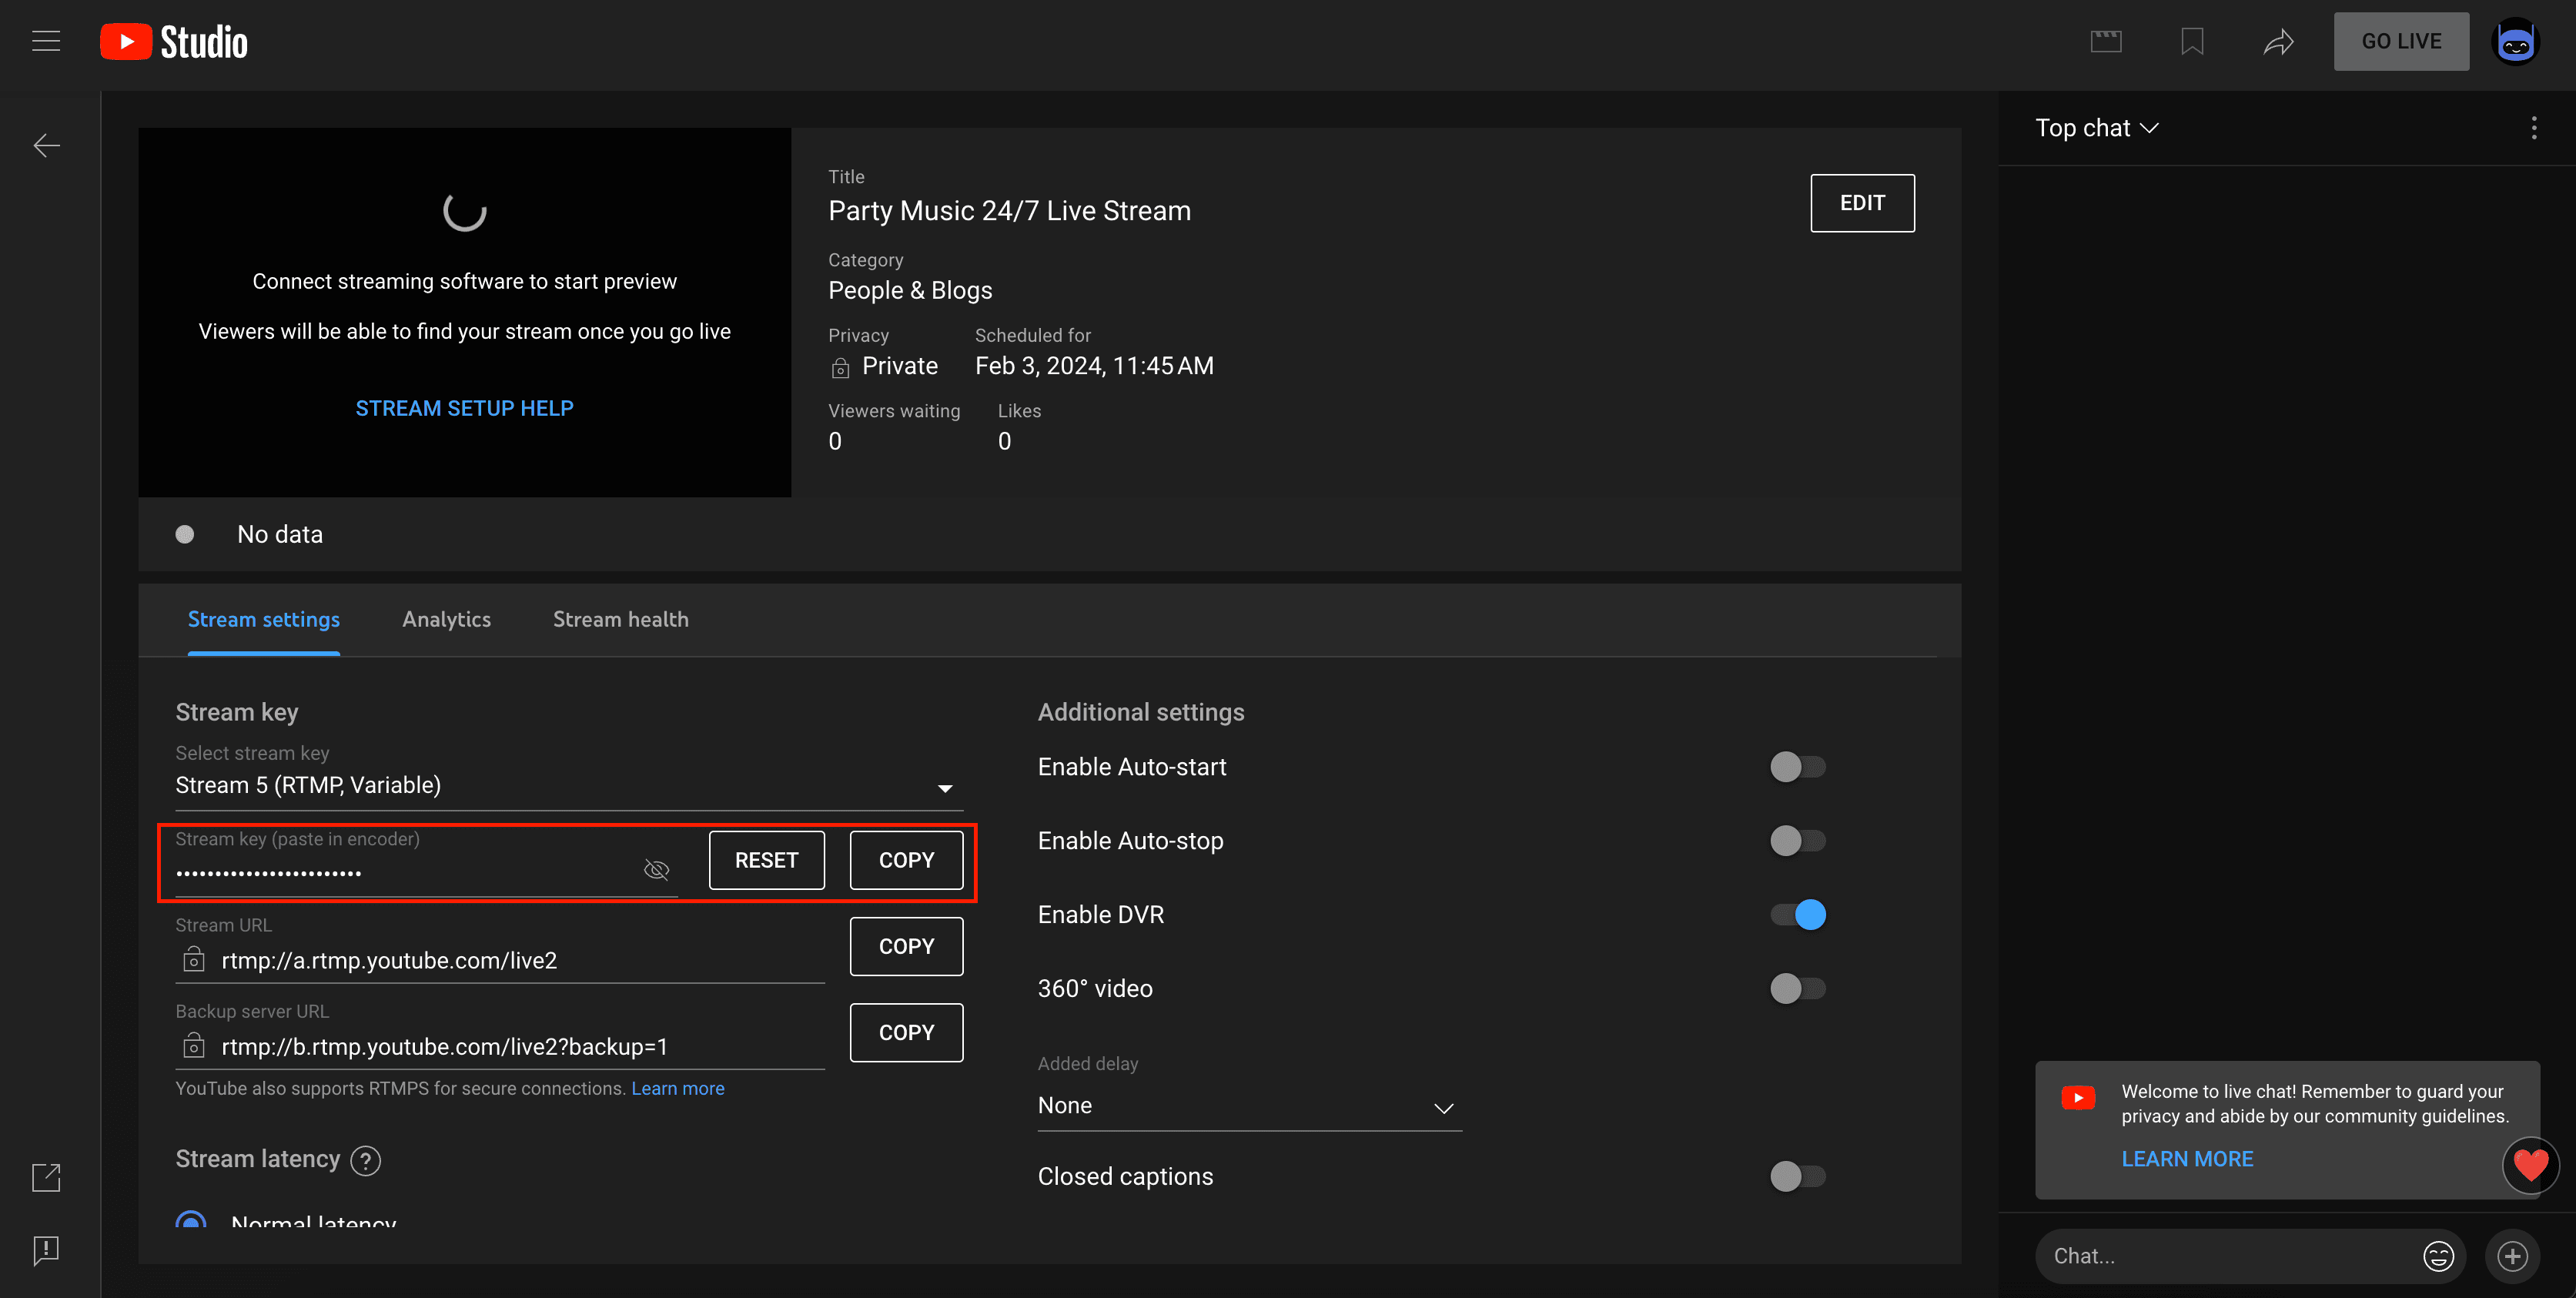
Next step will be to create your live stream on youtube. First, go to your YouTube Live Stream Dashboard. Then, click on "Manage" and lastly click on "Schedule Stream".Fill in your live stream information. Write a cool title of what your live stream is about. Add some nice description and tags and keep in mind to make your title and description SEO friendly, that is, think of what your viewers will be searching for to find your live stream and include those terms.

After you have created the live stream, you will find yourself in this Live Stream Management Dashboard. Take copy your live stream key as you will need it to setup OBS studio.
Step 3: Configure OBS Studio for YouTube Streaming
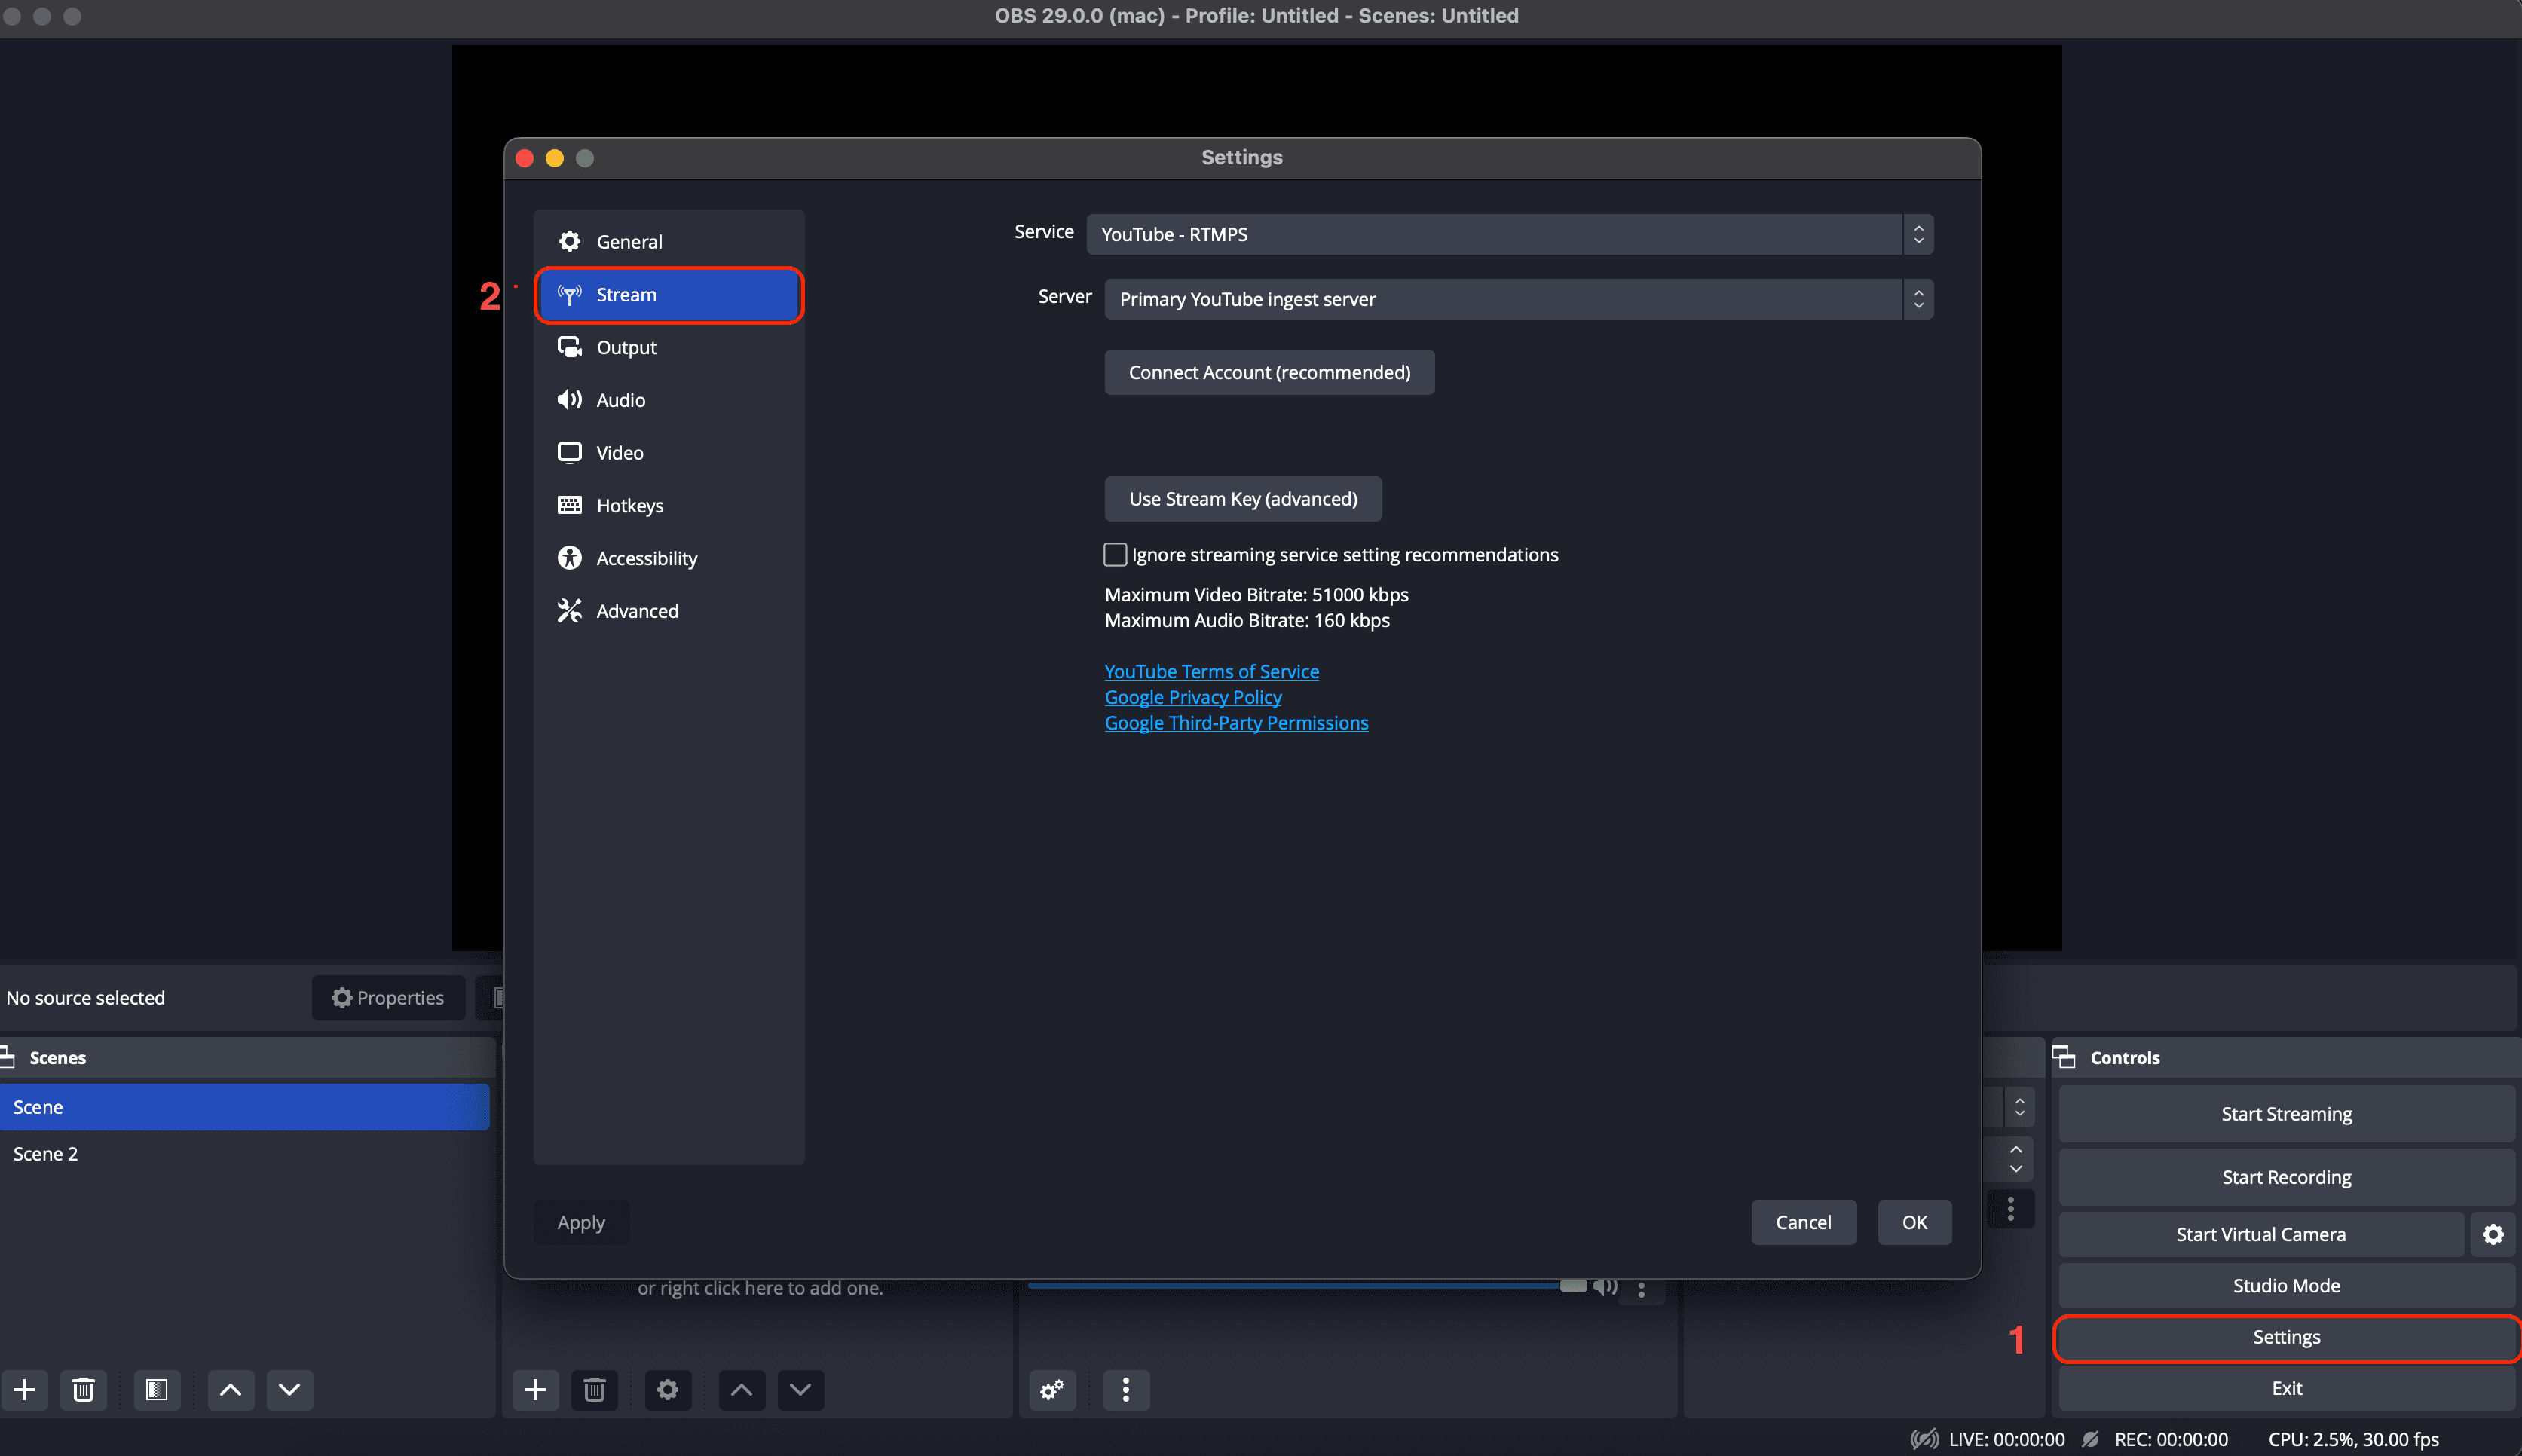
Once OBS Studio is installed, open the application and navigate to the "Settings" menu. Click on "Stream" and select "YouTube/YouTube Gaming" as your service. Connect your YouTube account by entering the stream key, which can be found in your YouTube Live Dashboard from the previous step, or by connecting your YouTube account. Then click on "Ok".
Step 4: Set up your 24/7 live stream Scenes
Next step will be to setup your scenes and media sources.
Setting up a video loop with VLC
If you have a playlist of videos that you want to stream 247, you should follow the following steps:
Add VLC Source
From the sources section, click on the Plus "+" button and choose "VLC Video Source". Then you can choose from "Create new" or "Add existing" if you already created it previously. Then click on "Ok".
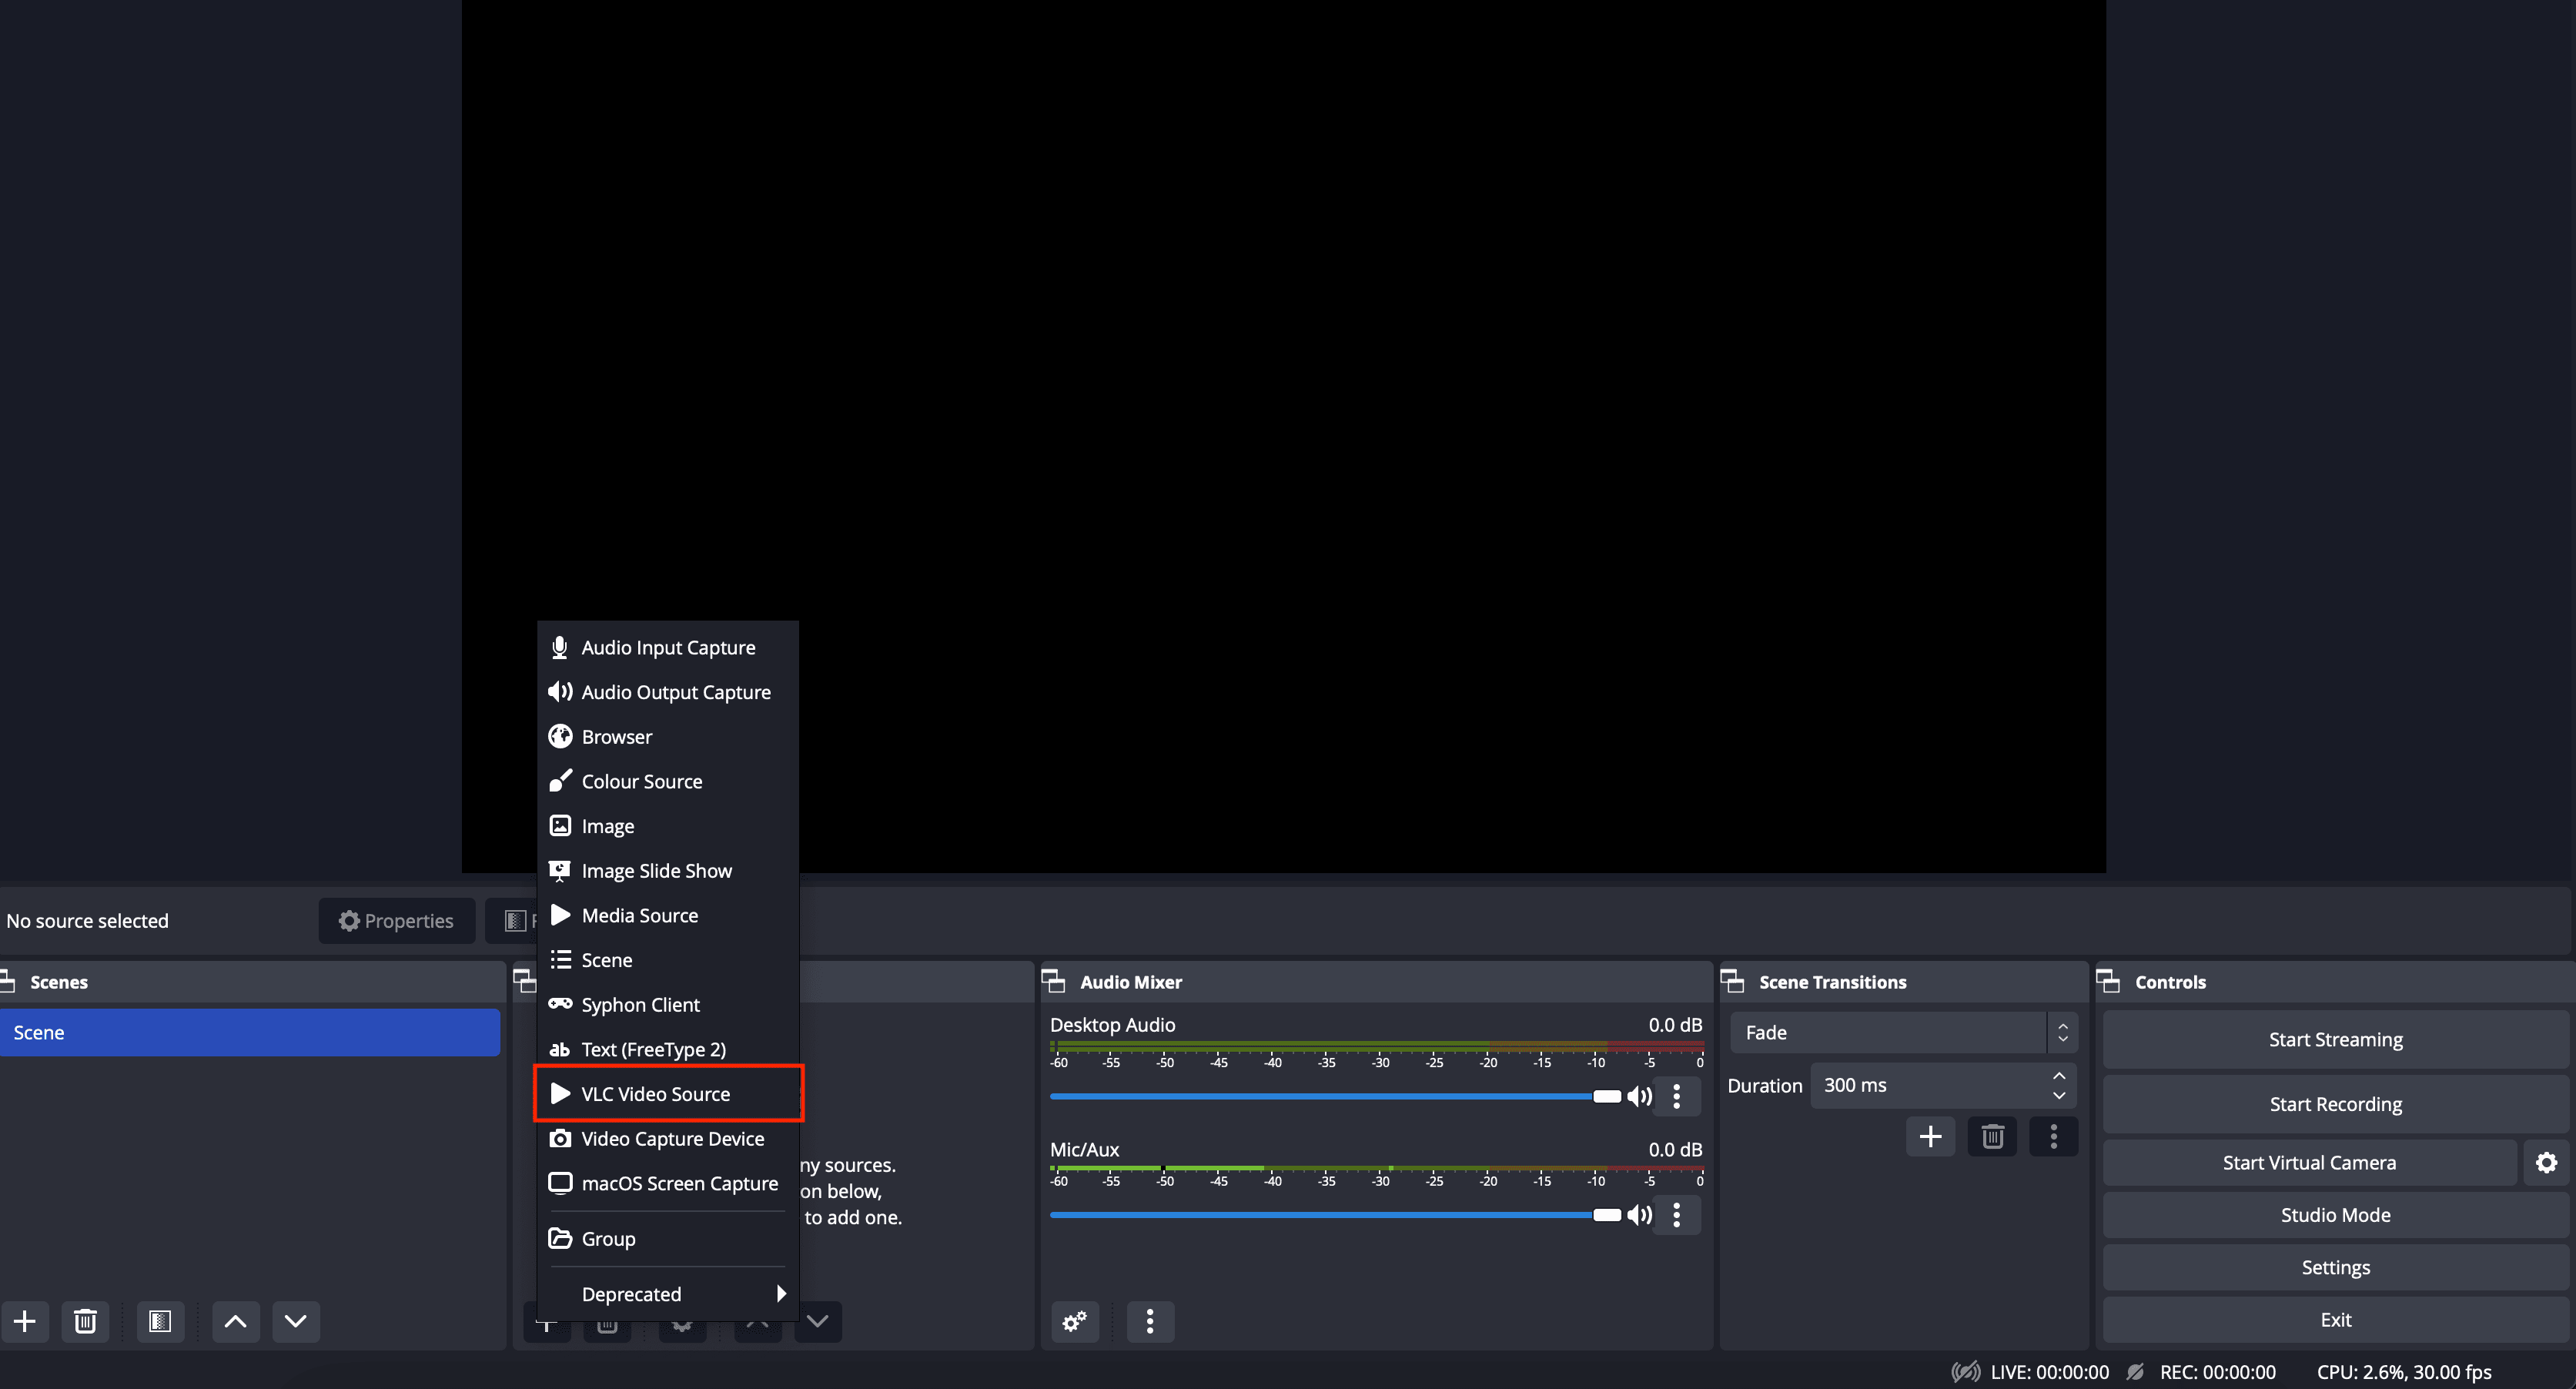
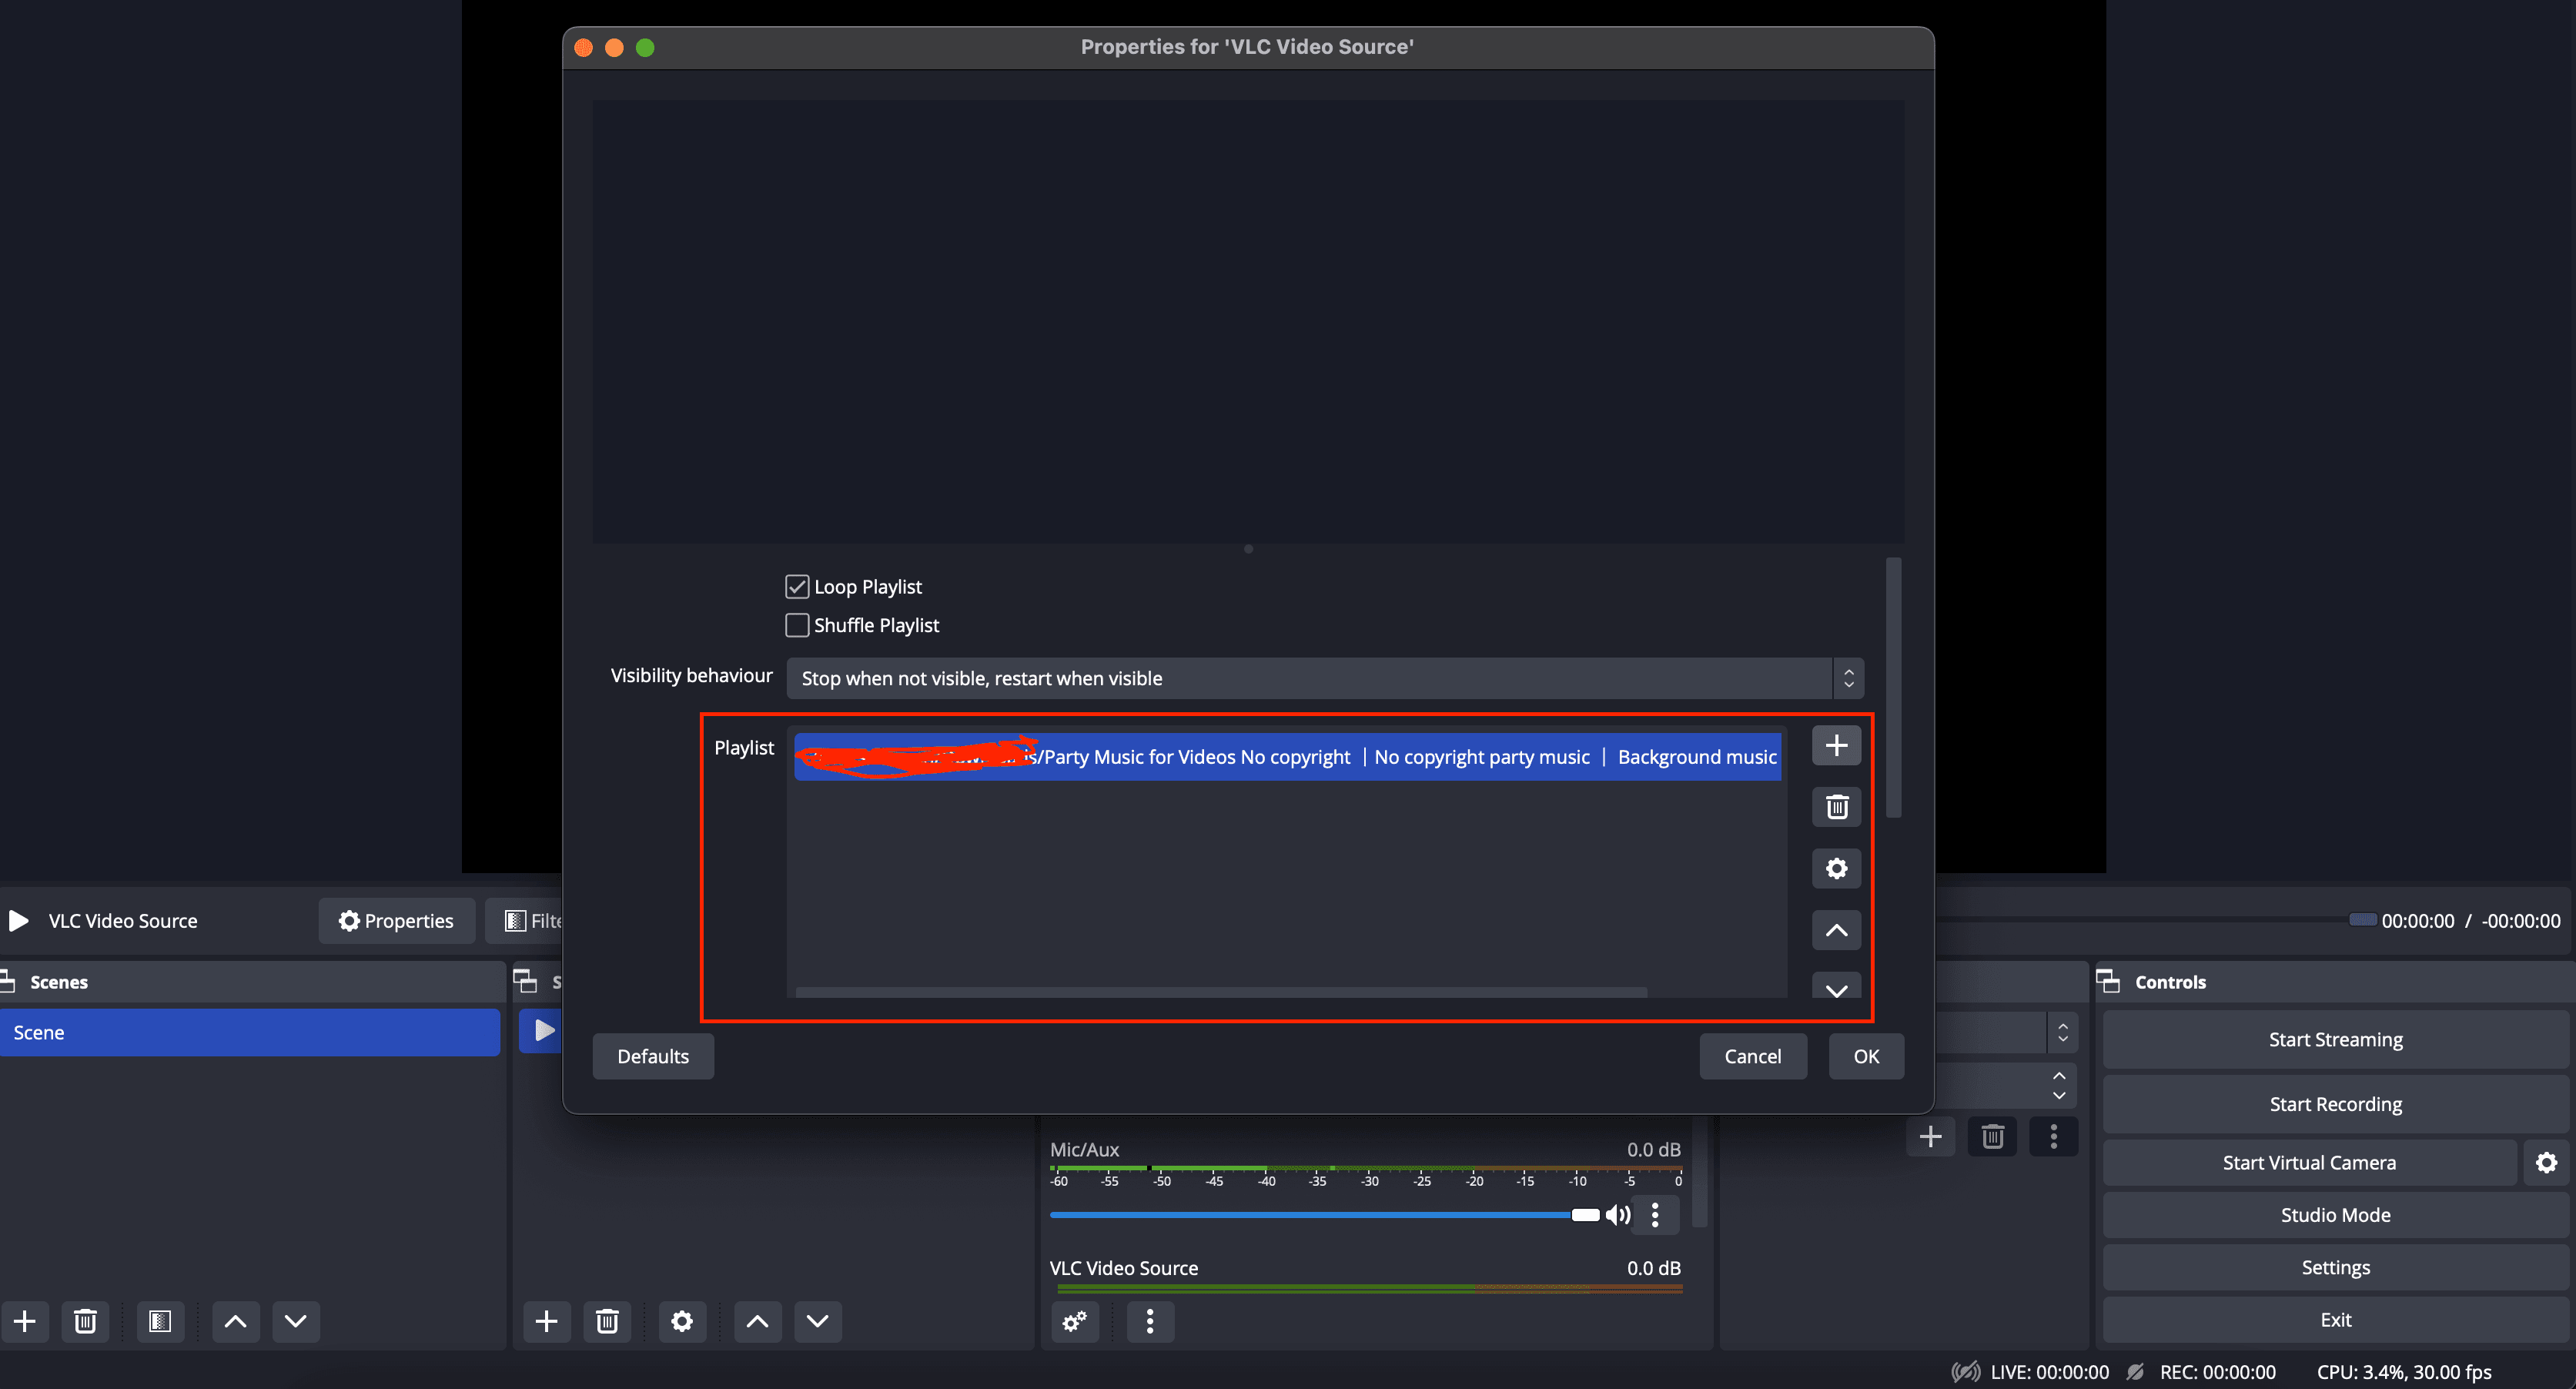
Here, you can add all your video files. Click on the Plus "+" button and select the videos that you want to 247 livestream. Once you have added all the video files to the playlist, click on "Ok" to save it.
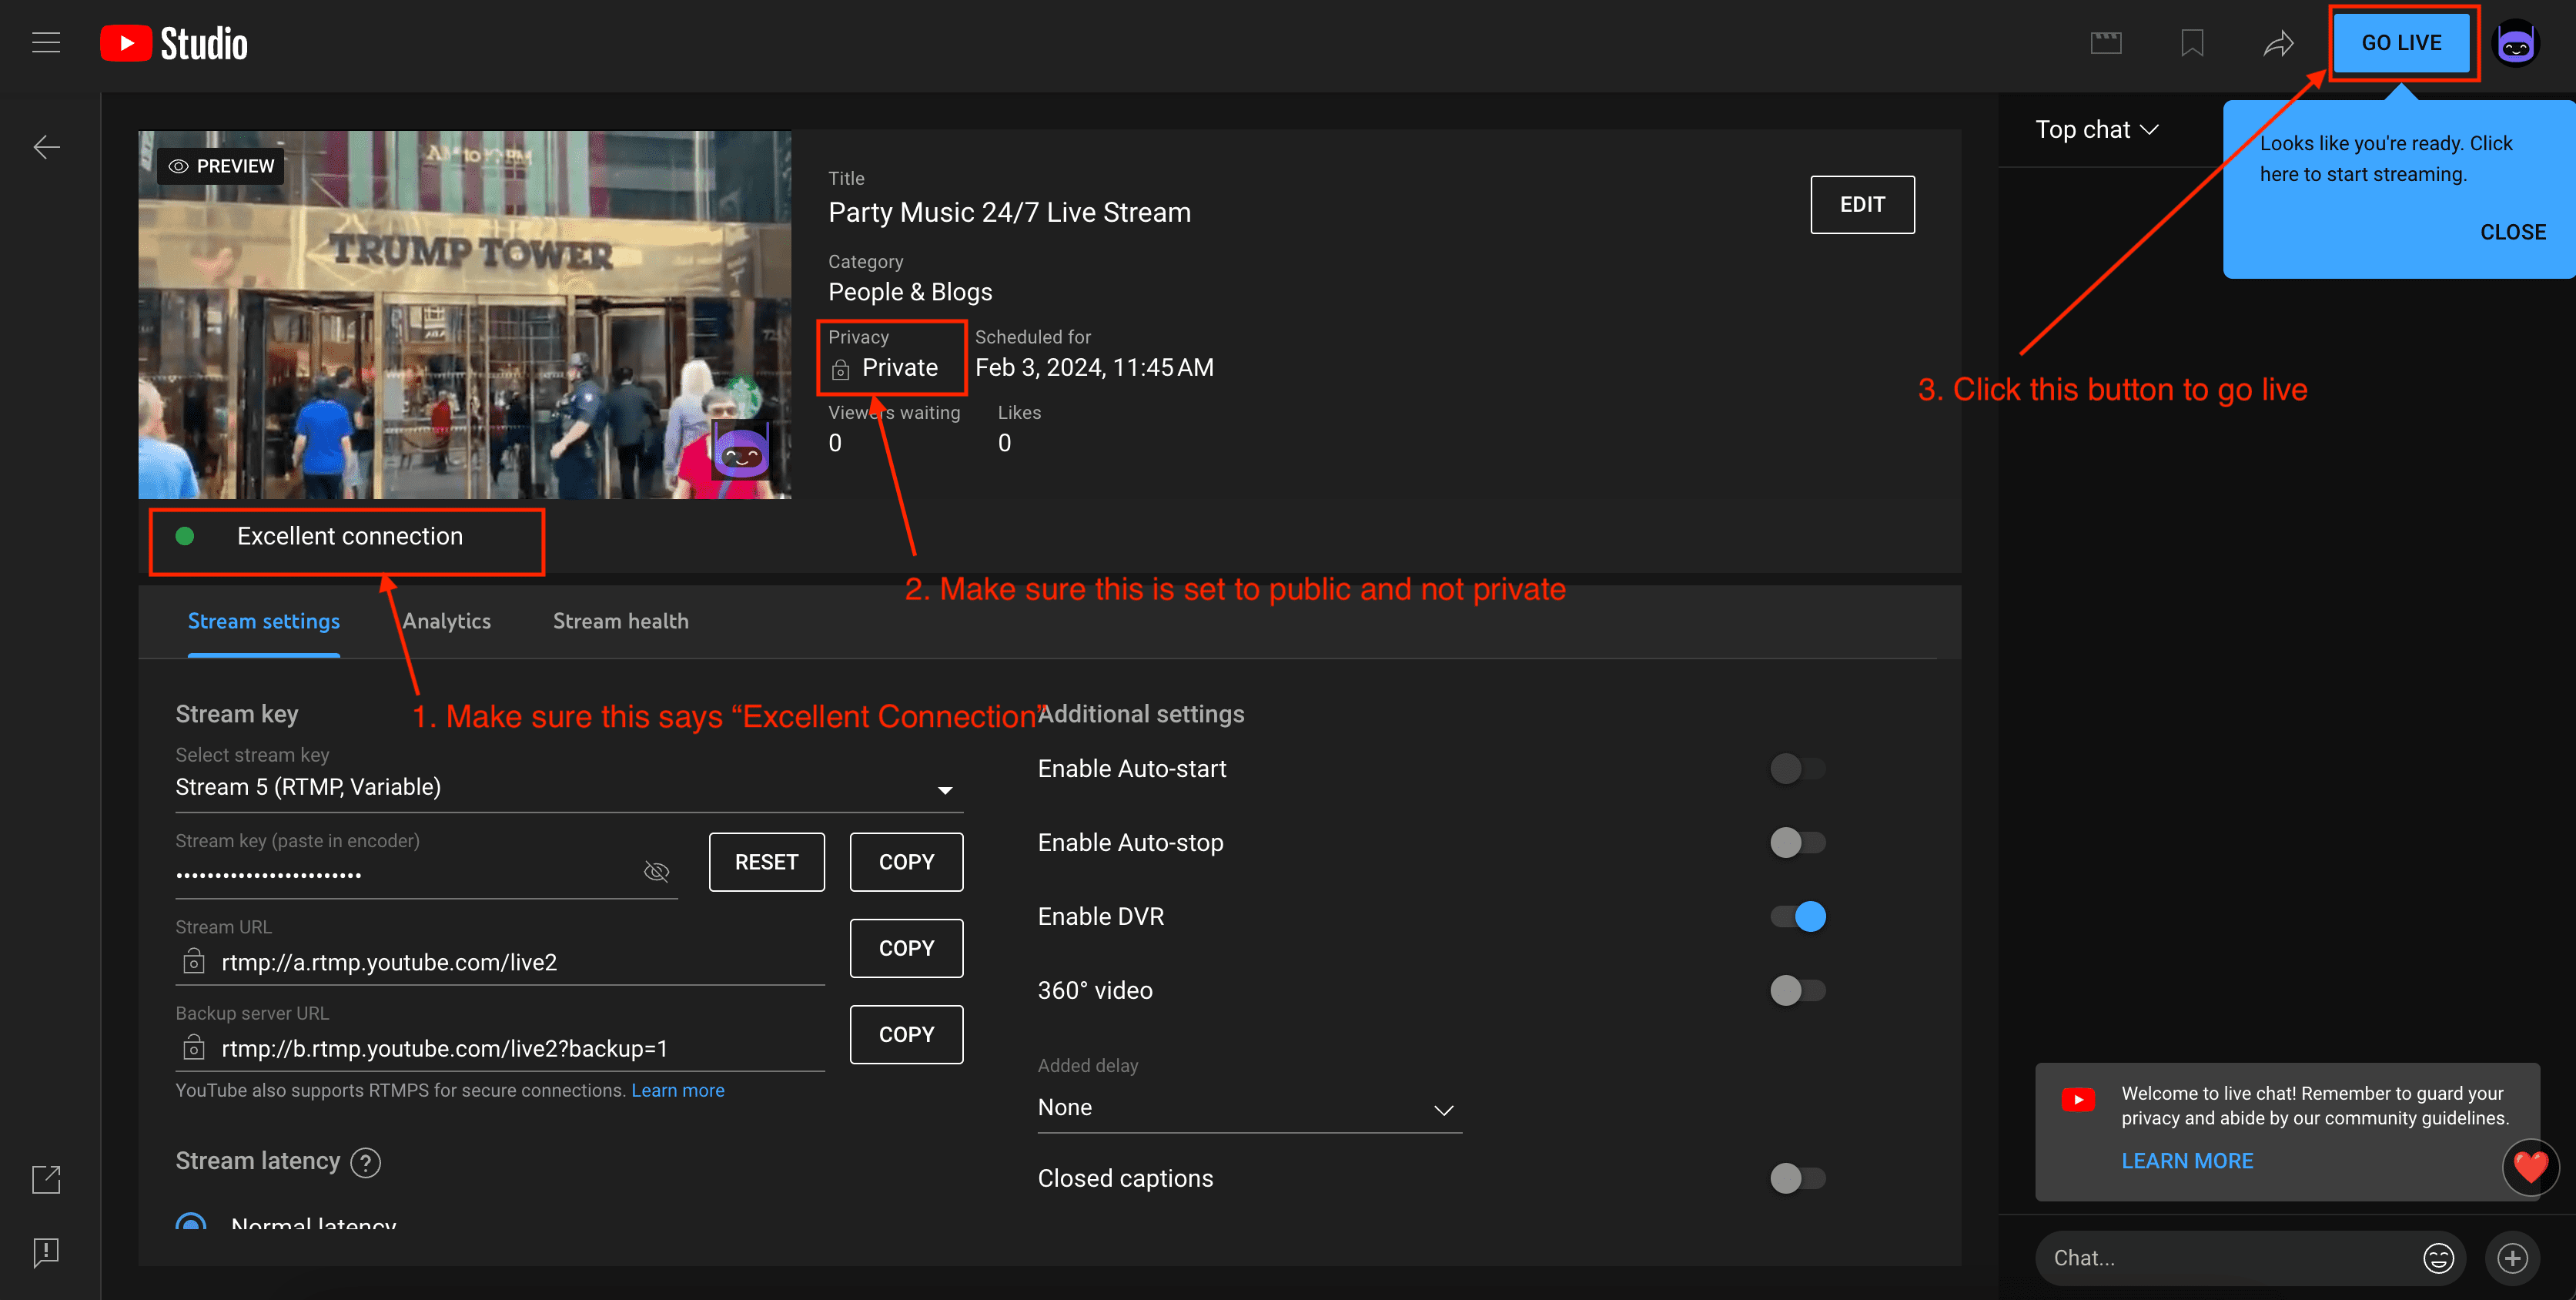
Start the live stream
Congratulations! you're now all set to start your pre-recorded 24/7 live stream!

Now, you're ready to go live from your YouTube dashboard
Using OBS for streaming 24/7 Pros
Here are the main benefits of using OBS Studio to stream 24/7
- - It's completely free to use
- - Complete control over your live stream
Using OBS for streaming 24/7 Cons
While OBS Studio has benefits, you need to be aware of the drawbacks that you might face
- - You have to keep your computer always running
- - You need a strong and stable network connection
- - OBS might not automatically restart your live stream in case of a network outage or fluctuation
- - Depending on your computer processor, you might not be able to use it for something else as live streaming is CPU intensive
Using Streaming Bots for 24/7 live streaming
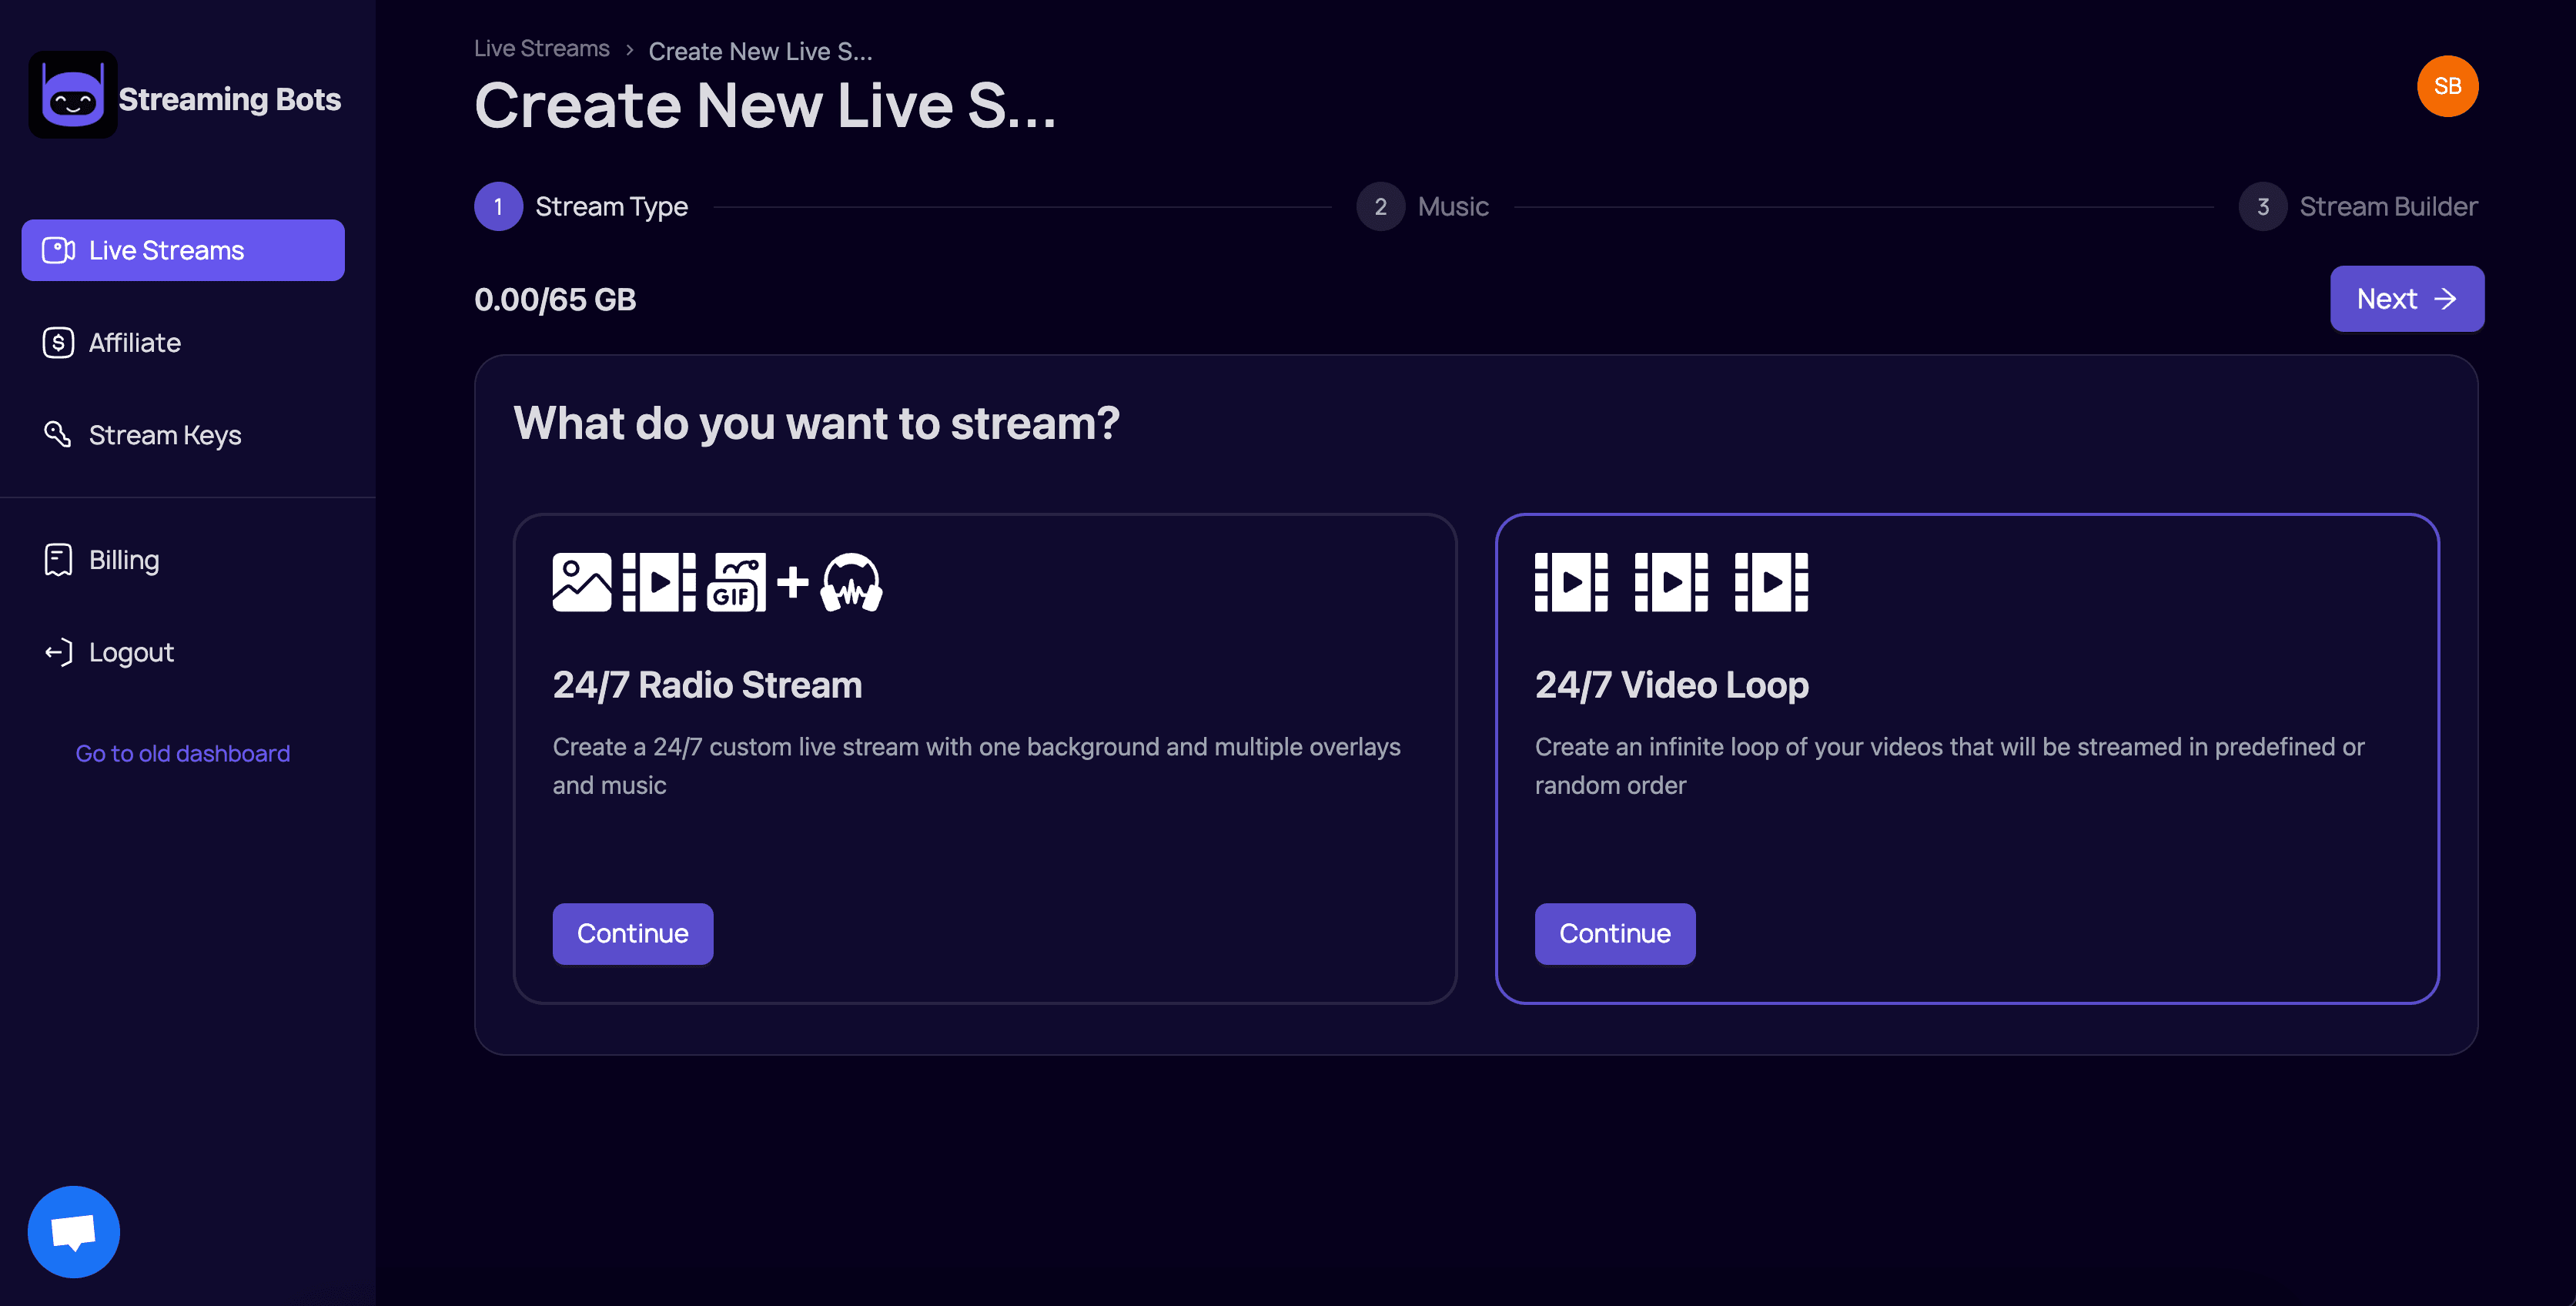
If you're looking for a service that can take care of all the technical details for you to run your 24/7 live stream. You can try our easy-to-use live stream builder!
Choose your live stream type
You can choose to live stream pre-recorded videos using the "Video Loop" option. Or to make a radio live stream using the "Radio Stream" option
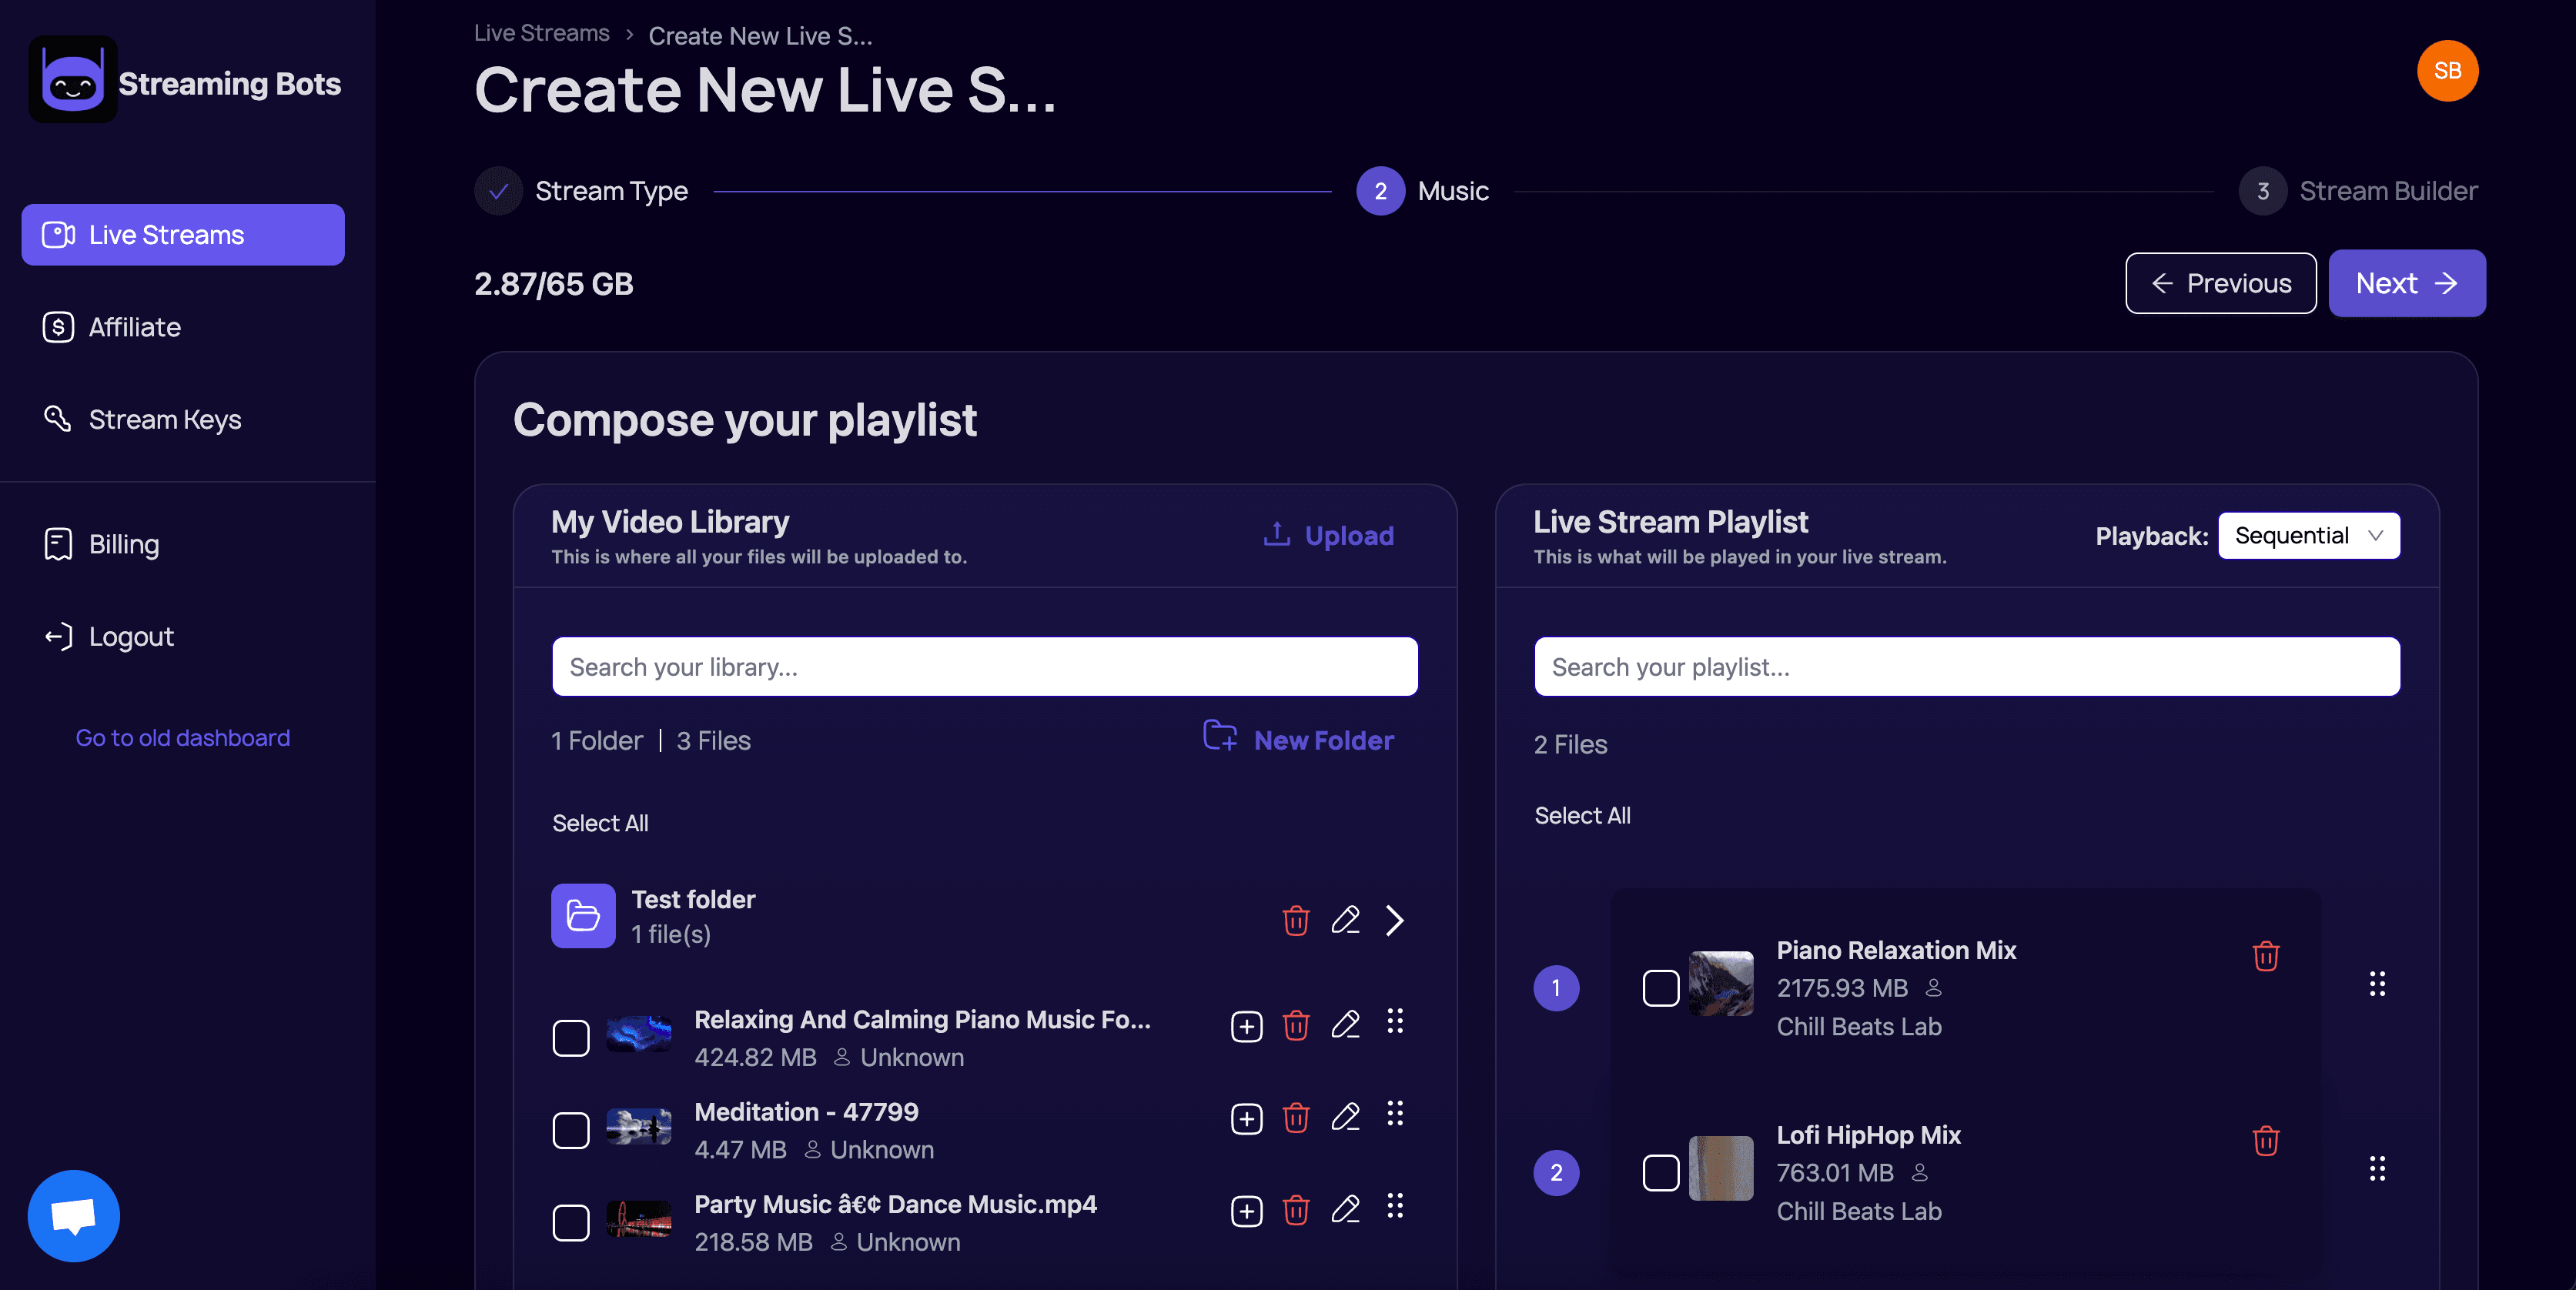
Upload your content
Easily upload your videos and compose your playlist for the 24 hour live stream
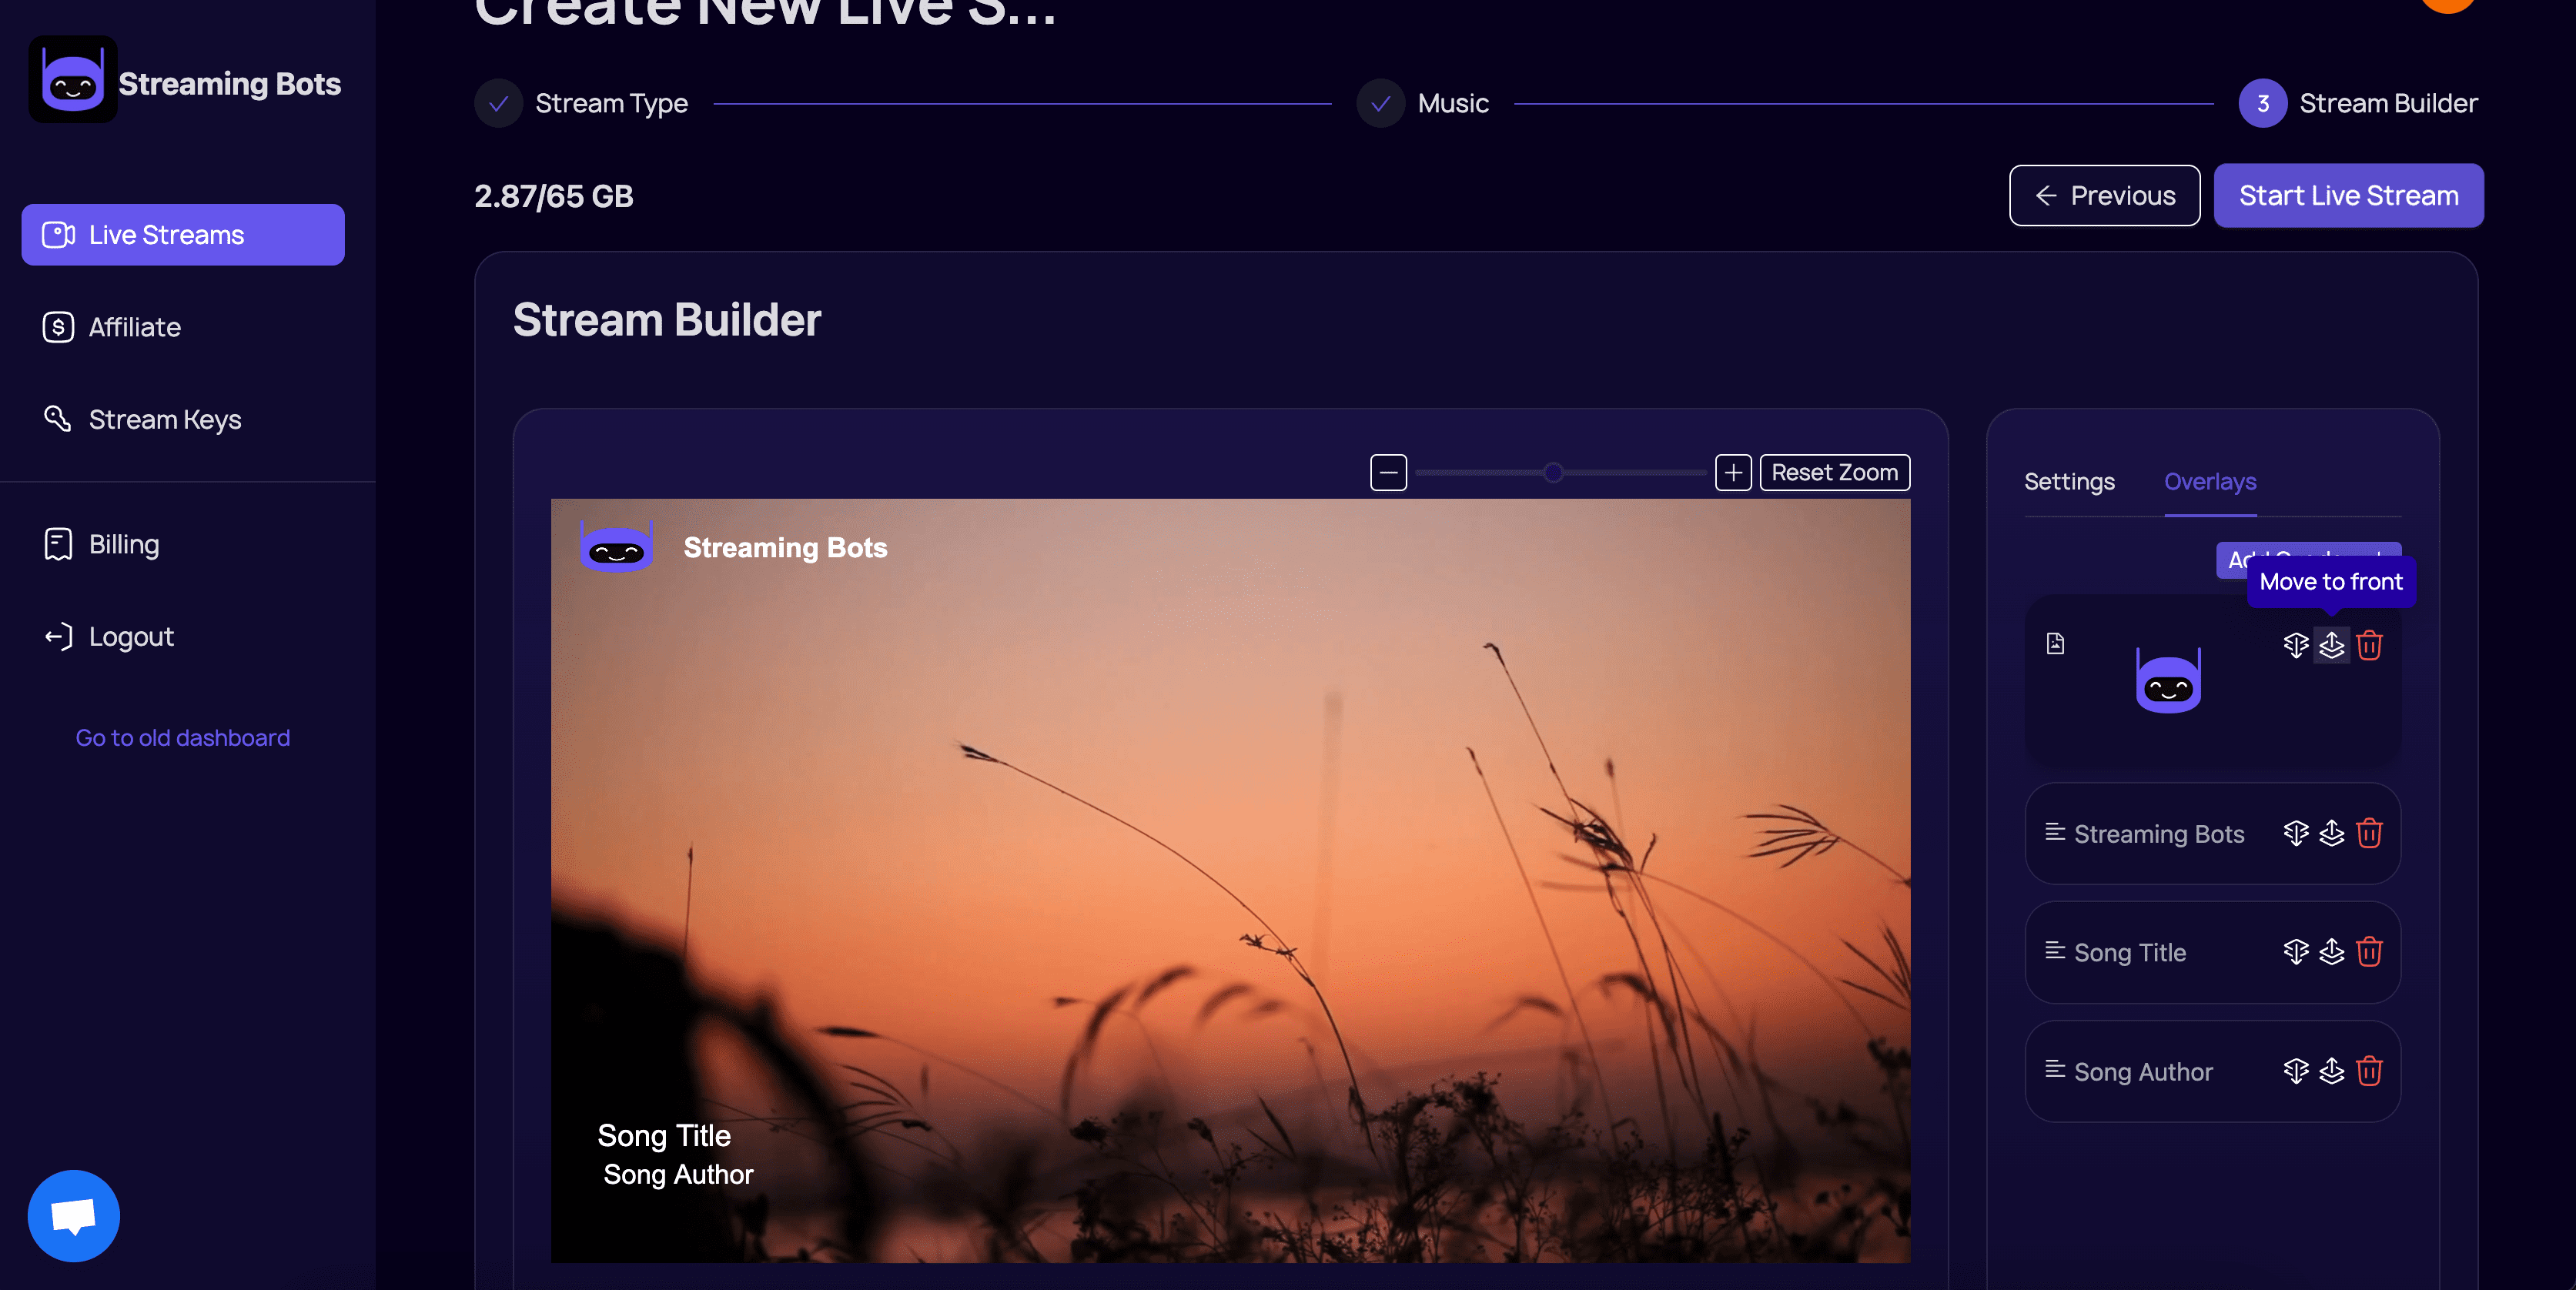
Customize it with overlays
Add your branding, logo, song title and author to keep your audience engaged! Then click on "Start Live Stream"
Using Streaming Bots Pros
- - Complete control over your live stream content
- - You don't have to keep your computer running as it's being streamed on our dedicated servers
- - You don't need to have a strong network connection as it doesn't consume from your network data
- - Our system monitors your live stream to make sure it's always running, and automatically restarts it if ever necessary